How to Repair a Rain Bird Sprinkler Valve in Denton, TX
Rain Bird is the most common irrigation valve brand in Denton residential systems. The 100-DV, the PESB, and the EFB-CP models show up in yard after yard across Denton, Highland Village, and Corinth. They are reliable valves with a long track record, but they do fail, and when they do, the repair parts are inexpensive and the fix is something most homeowners can handle in under thirty minutes.
This guide covers how to identify which Rain Bird valve you have, how to diagnose what is wrong with it, and how to replace the specific parts that fail most often in Denton’s hard water and clay soil conditions.
Which Rain Bird Valve Do You Have?
Before you buy parts, you need to confirm the model. Look at the top of the valve body. The model number is molded directly into the plastic bonnet.
**Rain Bird 100-DV:** The most common model in Denton. Rectangular bonnet, four screws, standard 1-inch inline design. The model number ‘100DV’ is visible on top. This valve uses a standard round diaphragm and is compatible with Rain Bird’s 100-DV solenoid.
**Rain Bird PESB:** A globe-style valve (the inlet and outlet are on the same plane). Common in older Denton systems installed in the late 1990s and early 2000s. The bonnet is dome-shaped with four to six screws. PESB stands for Plastic, Electric, Slow-closing, Brass-seat.
**Rain Bird EFB-CP:** The commercial-grade version. Less common in residential yards but occasionally found in larger Denton properties. It is heavier and has a brass body rather than plastic.
If the valve is too dirty or corroded to read the model number, take a photo of the entire valve and bring it to an irrigation supply store or a Home Depot irrigation counter. They can usually identify the model from the shape alone.
Tools and Parts You Will Need
For a standard Rain Bird 100-DV or PESB repair, gather the following before you open the valve box:
**Tools:**
- Flat-head screwdriver
- Needle-nose pliers
- Small wire brush
- Clean rag
**Parts (buy for the specific model):**
- Rain Bird 100-DV Diaphragm Kit (includes diaphragm, spring, and metering port insert) if repairing a 100-DV
- Rain Bird PESB Diaphragm Kit if repairing a PESB
- Rain Bird solenoid (model-specific, confirm before purchasing)
- Waterproof wire connectors (blue or gray)
All of these are available at Home Depot on Fort Worth Drive in Denton or at Ewing Irrigation on I-35E. The diaphragm kit typically costs six to twelve dollars. The solenoid runs twelve to twenty dollars.
How to Diagnose a Failing Rain Bird Valve
The symptoms match those of any irrigation valve, but Rain Bird valves in Denton fail in a few predictable patterns due to the local water chemistry.
**Zone will not turn on:**
Check the solenoid first. At the valve box, turn the solenoid counterclockwise by hand about a half-turn. If water starts flowing, the solenoid has failed electronically but the valve itself is mechanically sound. If the zone still does not run, check the wiring and then open the valve for a diaphragm inspection.
**Zone will not turn off:**
This almost always means the diaphragm has torn or a piece of debris is blocking the valve seat. Denton’s hard water leaves calcium deposits on the seat that can eventually hold the diaphragm slightly open. Open the valve and inspect the diaphragm and seat closely.
**Zone runs but with low pressure:**
The metering port inside the Rain Bird 100-DV bonnet can become partially blocked with mineral scale. This is a common issue in Denton specifically because of the city’s water hardness. The metering port is the small hole in the center of the diaphragm body. It can often be cleared with a fine wire or soaked in vinegar.
**Valve makes a buzzing or chattering sound:**
This is the solenoid plunger vibrating. It usually means the solenoid coil is beginning to fail or the plunger is partially stuck from debris. A replacement solenoid fixes this immediately.
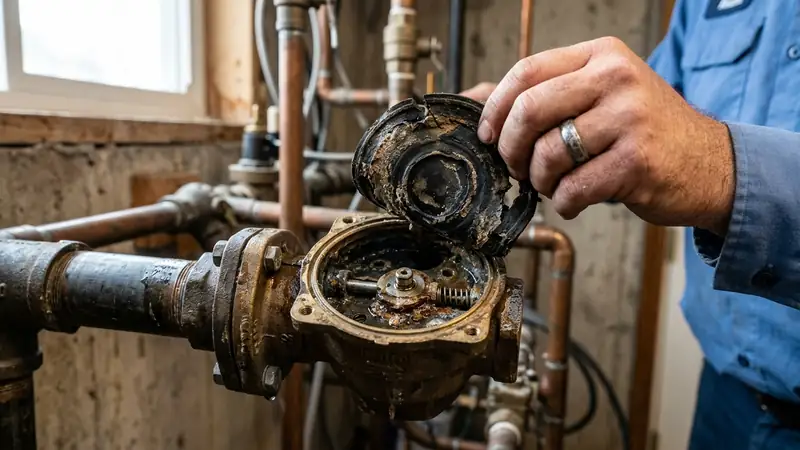
How to Replace the Rain Bird 100-DV Diaphragm
This is the most common Rain Bird valve repair in Denton. The entire process takes about fifteen to twenty minutes.
**Step 1:** Turn off the main irrigation water supply. The 100-DV must be depressurized before opening the bonnet or water will spray out when you remove the screws.
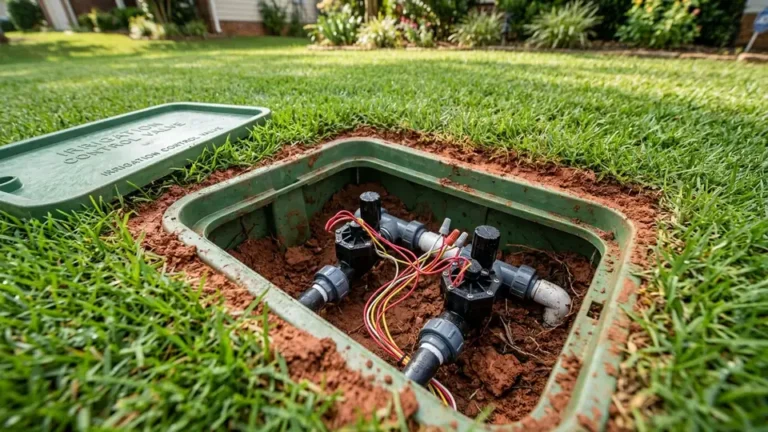
**Step 2:** Open the valve box and locate the Rain Bird 100-DV. Remove the four screws from the bonnet. Keep them together, they are small and easy to lose in the valve box.
**Step 3:** Lift the bonnet straight off the valve body. The bonnet and body separate cleanly when all four screws are out.
**Step 4:** The diaphragm sits inside the bonnet, pressed against the valve seat. It is a round rubber disc about the size of a large coin. Lift it out with your fingers or needle-nose pliers. Note the orientation. The smooth side faces the valve seat.
**Step 5:** Remove the spring from beneath the diaphragm. This is a small coil spring that fits into a recess in the valve body.
**Step 6:** Look at the valve seat. This is the flat circular surface the diaphragm was pressing against. In Denton systems, it is common to find a ring of white or yellowish mineral scale here. Wipe the seat clean with a damp rag. For stubborn mineral buildup, lay a vinegar-soaked rag on the seat for five minutes, then scrub with the wire brush and wipe dry. The seat must be spotless for the new diaphragm to seal.
**Step 7:** Inspect the metering port. This is the small hole in the center of the valve body. It should be open and clear. If it appears blocked, carefully clear it with a fine wire or toothpick. Do not enlarge the hole.
**Step 8:** Place the new diaphragm from your Rain Bird kit onto the seat, smooth side down. It should sit flat and centered without any buckling.
**Step 9:** Place the spring into its recess on top of the diaphragm.
**Step 10:** Reattach the bonnet and hand-tighten the four screws. Then snug them down in a cross pattern. Do not overtighten. The gasket inside the bonnet creates the seal, not the torque on the screws.
**Step 11:** Turn the water supply back on slowly. Run the zone from the controller. Watch the valve for any leaks around the bonnet seam. Confirm the zone shuts off cleanly when the controller stops the signal.
How to Replace a Rain Bird Solenoid
If the diaphragm is fine but the zone still will not respond to the controller, the solenoid is likely the cause.
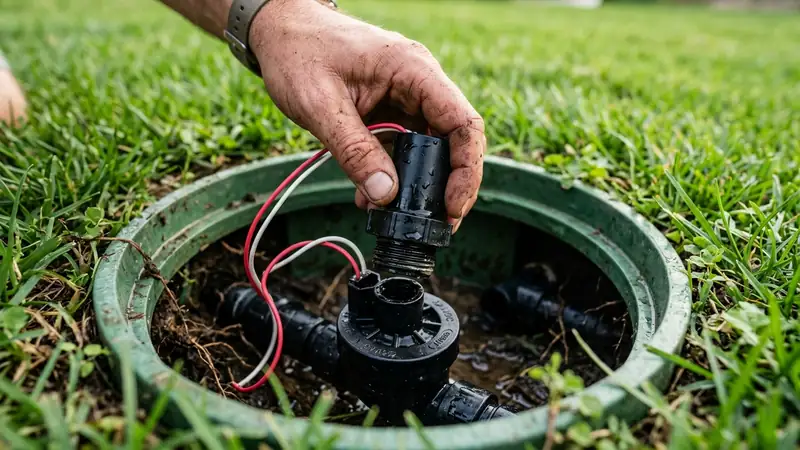
**Step 1:** With the irrigation system off at the controller (the valve does not need to be depressurized for a solenoid swap), locate the solenoid on top of the valve body. It is the cylindrical component with two wires coming out of it.
**Step 2:** Disconnect the two wire connectors. Unscrew the solenoid counterclockwise. A small amount of water will drip out as you remove it. This is normal.
**Step 3:** Pull the plunger out of the solenoid port in the valve body. Rinse it under clean water and check for cracks. If it is intact, keep it. If it is cracked or chipped, it needs to be replaced along with the solenoid.
**Step 4:** Drop the plunger back into the port, thread the new solenoid in clockwise, and hand-tighten. Do not use tools on the solenoid body. Overtightening cracks the plastic housing.
**Step 5:** Reconnect the two wires using fresh waterproof connectors. The solenoid is not polarity-sensitive, so it does not matter which wire goes to which terminal.
**Step 6:** Run the zone from the controller and confirm normal operation.
Rain Bird Valve Maintenance Tips for Denton
Denton’s water chemistry and clay soil create conditions that accelerate Rain Bird valve wear. A few simple habits extend valve life significantly.
Annual diaphragm inspection is worthwhile for any Rain Bird valve that is over seven years old. Open the bonnet once a year, pull the diaphragm, and inspect it for hairline cracks or stiffness. A diaphragm that is starting to harden will fail within the next one or two seasons. Replacing it proactively costs about eight dollars and takes fifteen minutes.
Vinegar soaks help with mineral buildup. Denton’s water hardness deposits calcium on the valve seat and metering port over time. Once a year, opening the valve and giving the interior a brief vinegar soak keeps the seat clean and the metering port clear without requiring any chemical products.
Wire connector replacement is often overlooked. The waterproof wire connectors inside Denton valve boxes corrode faster than average due to the local soil chemistry. During any valve repair, inspect the wire connections. Green or white corrosion on the copper indicates it is time to cut back to clean wire and install fresh connectors.
When to Call a Professional
Most Rain Bird valve repairs are straightforward. If you are replacing a diaphragm or solenoid, the job is within reach for most homeowners. However, a few situations warrant calling a professional for sprinkler valve repair Denton.
If the valve body itself is cracked, a repair requires cutting into the PVC manifold and solvent-welding a new valve in place. This is not a beginner repair. If the zone still does not respond after a solenoid swap and the wiring checks out, the problem may be a wiring fault between the controller and the valve box that requires a continuity meter to diagnose. If you have rebuilt the diaphragm and the zone still leaks, the valve seat may be pitted or damaged beyond cleaning, which means the entire valve body needs to be replaced.
Our team handles Rain Bird valve repairs in Denton every week. For a complete overview of the repair process across all valve brands, see our guide on how to repair a sprinkler valve or our guide to sprinkler valve leak repair if the main symptom is water seeping from the valve box.
Need a Diagnosis Before You Buy Parts?
If you are not sure whether the issue is the solenoid, the diaphragm, or something deeper, a quick call to our team can save you an unnecessary parts run. We carry Rain Bird rebuild kits on the truck for the 100-DV, PESB, and EFB models, and we can fix most Rain Bird valve issues in a single visit.
When you call sprinkler repair in Denton TX, you work with a TCEQ Licensed Irrigator who gives you an honest assessment before anything is ordered or replaced.
Frequently Asked Questions
Still Having Trouble with Your Rain Bird Valve?
These valves are workhorses, but every valve reaches the end of its reliable service life. If you have replaced the diaphragm and solenoid and the issue persists, or if the valve body is cracked or the threads have stripped, it is time for a full replacement.
Our team carries the Rain Bird 100-DV, PESB, and EFB models on the truck and can swap out a valve in most Denton yards within a single service visit. We provide upfront pricing before we touch anything and no hidden diagnostic fees.
Call ProFlow Sprinkler Repair for sprinkler repair in Denton TX today. Same-day service available.